Running a containerized application in the cloud using AWS App Runner
Exploring the new AWS App Runner service
I’ve been pretty deep in the cloud space for a few weeks now, researching different topics related to system design and playing around with different AWS services. So far I’ve been playing around with containers and figuring out ways I could deploy a simple containerized application to the cloud without much fuss. I’ve found AWS Elastic Container Service and AWS Elastic Kubernetes Service (more on kubernetes in another blog post, I’ve been having fun learning about it) but those are more for managing clusters of containers than just being able to deploy something simple and small. I’ve also looked at AWS Elastic Beanstalk and while it is possible to deploy docker containers through that service I haven’t had much luck doing it through the UI or the Elastic Beanstalk CLI.
Enter AWS App Runner
This was actually just released a few days ago and is pretty much exactly what I needed for the application I wanted to run. It is pretty similar to Elastic Beanstalk in some ways but with Elastic Beanstalk there are still some things you need to configure yourself like SSL for example whereas with App Runner that’s already ready and configured for you. You can simply upload a docker image to your AWS Container registry or link your github repository and any time the image is updated or new code is pushed it’ll re-run the build process and deploy your application (automatic deployments are opt-in and a flat $1/month). There are some costs associated with provisioned / active instances + the amount of RAM and CPU you choose and you’re billed by the hour but the cost is pretty low and depends on how much traffic your application is getting.
Deploying an application to App Runner
In these next few screenshots I’ll show going from a simple node application to a deployed version in App Runner. I will be using docker to deploy so if you don’t already have it installed and would like to follow along I’d suggest doing that now.
Bootstrapping our application
So, you’ve decided to feed your hotwheels addiction by making an application to trade hotwheels with other enthusiasts. Great idea! First we’ll need to install some dependencies.
mkdir hotwheels-trading-app && cd hotwheels-trading-app
npm init -y
npm install express
With our dependencies installed we can now start adding some code!
// index.js
const express = require("express");
const app = express();

app.get("/", (_, response) => {
  response.status(200).json({
    data: {
      message: "Welcome to my hotwheels app!",
    },
  });
});

app.listen(4000, () => console.log("App running!"));
Beautiful, ain’t it? You can test it out by running node index.js and navigating to http://localhost:4000.
Next we’ll containerize the application. Create a Dockerfile and add this to it.
FROM node:alpine

WORKDIR /app

COPY package*.json /app/

RUN npm install

COPY . /app/

CMD ["node", "index.js"]
Then build the image.
docker build -t hotwheels-app:latest .Then test it locally to make sure everything is still working.
docker run --name hotwheels-app -p 4000:4000 -d hotwheels-app:latestYou should be able to navigate to the same URL that we used before and see the same message. Alright cool, we’ve finished setting up our nifty application and now we want to get it to the public.
Uploading the image to AWS Elastic Container Registry
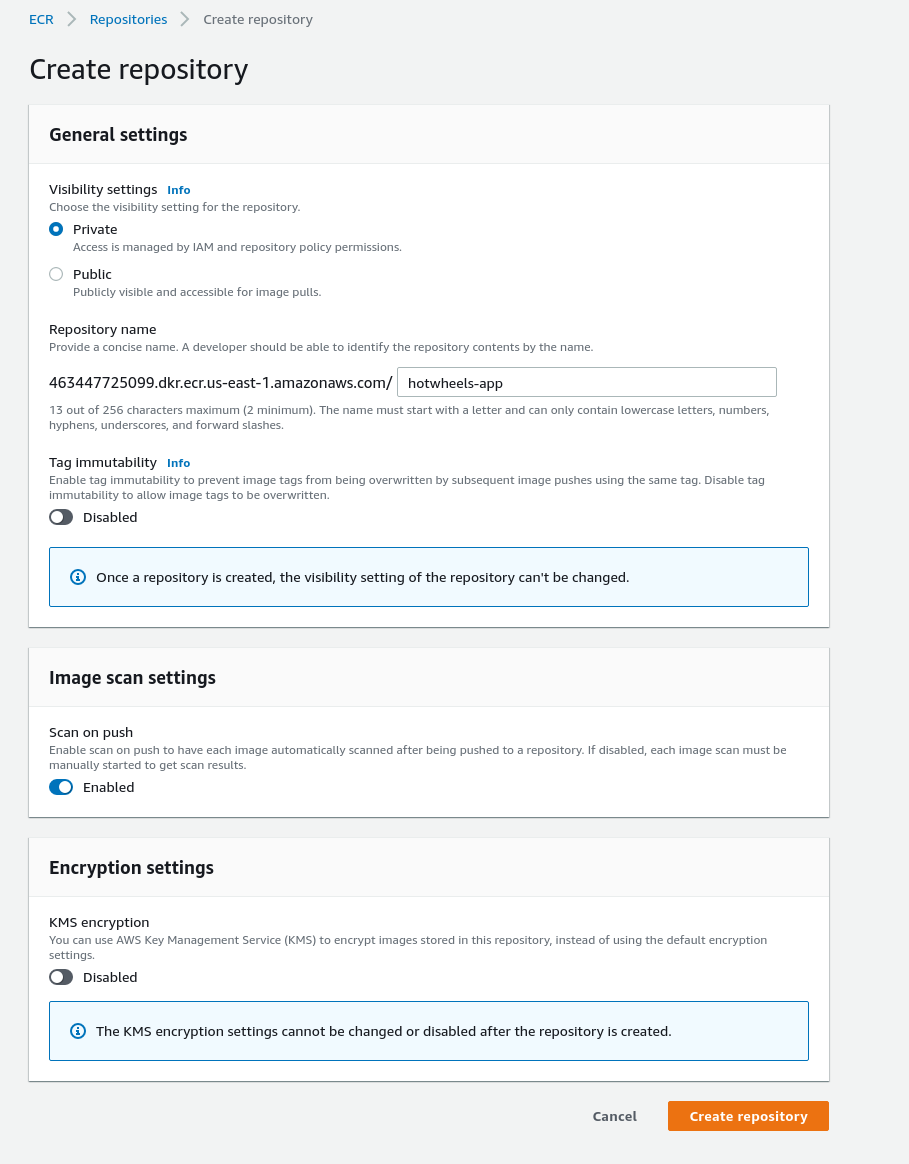
In the AWS console navigate over to the Elastic Container Registry
Then click create repository

You can just leave all the settings to default (I chose to turn scanning on just so it checks for vulnerabilites but for this you don’t need to turn it on)
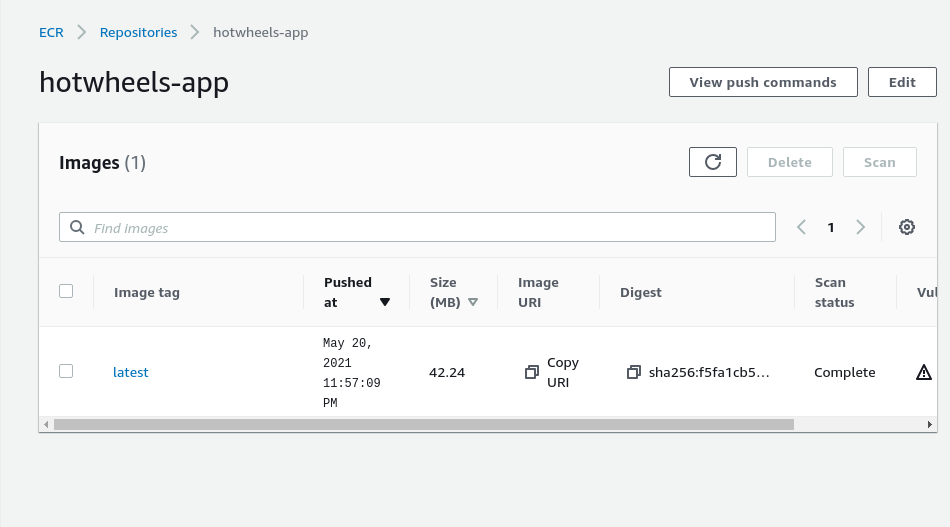
Once the repository is created you should see it in the list on the main screen, click the repository name then in the top right click “View push commands”. Copy and execute the commands one by one to push your image to the repository. After you’re done you should see your image in the repository (click the refresh button if you don’t).
That’s all that needs to be done for the docker image side of things. The last step would be to get everything set up in App Runner.
Deploying our cool new app 🚀
In the AWS console head over to AWS App runner.

Some more things App Runner includes out of the box are load balancing, auto-scaling and monitoring via cloud watch and since you’re already in the AWS ecosystem you can make use of the many other services they offer.
Click “Create an App Runner service” to get started. In the first step you’re prompted with a few different options. We’ll be using the docker image we uploaded to ECR so keep the repository type “Container registry” selected. The provider you can leave default also since we uploaded our image to a private repository but if you wanted to you could use public also so as long your image is in a public respository.
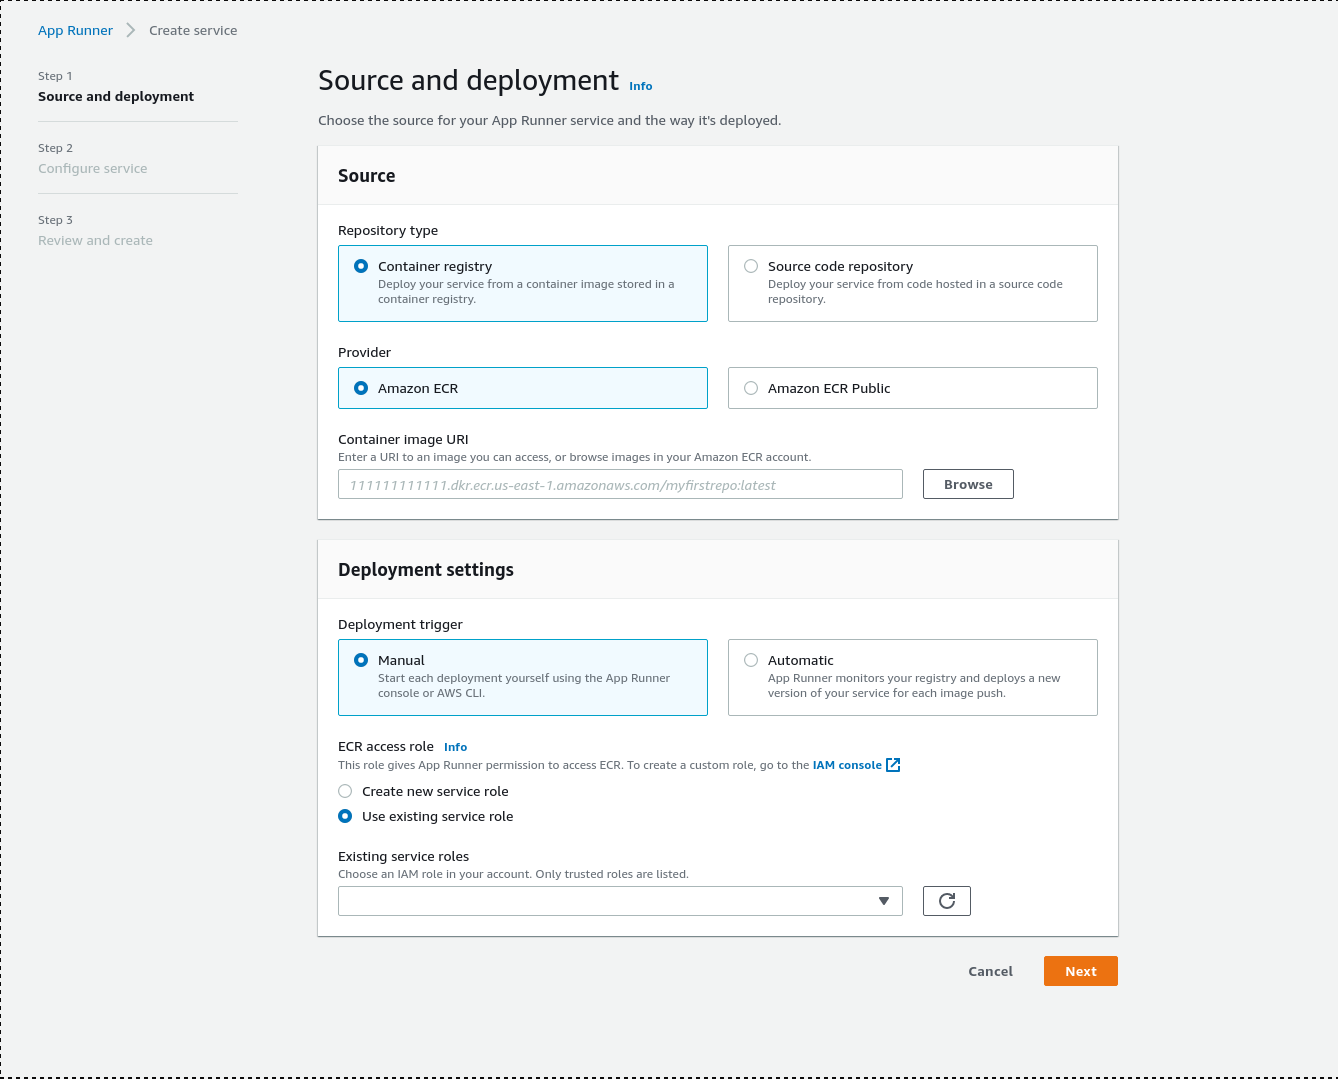
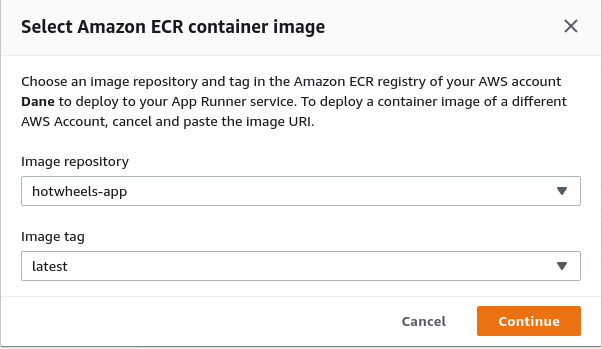
For the docker image click browse and select the hotwheels-app from the dropdown and then click continue.
For deployment settings you have the option between manual and automatic. As a reminder, automatic deployments do cost money ($1/month) so keep that in mind if you do select it. For this example I will but will also delete the application right after I am done as I don’t think it incurs a cost.
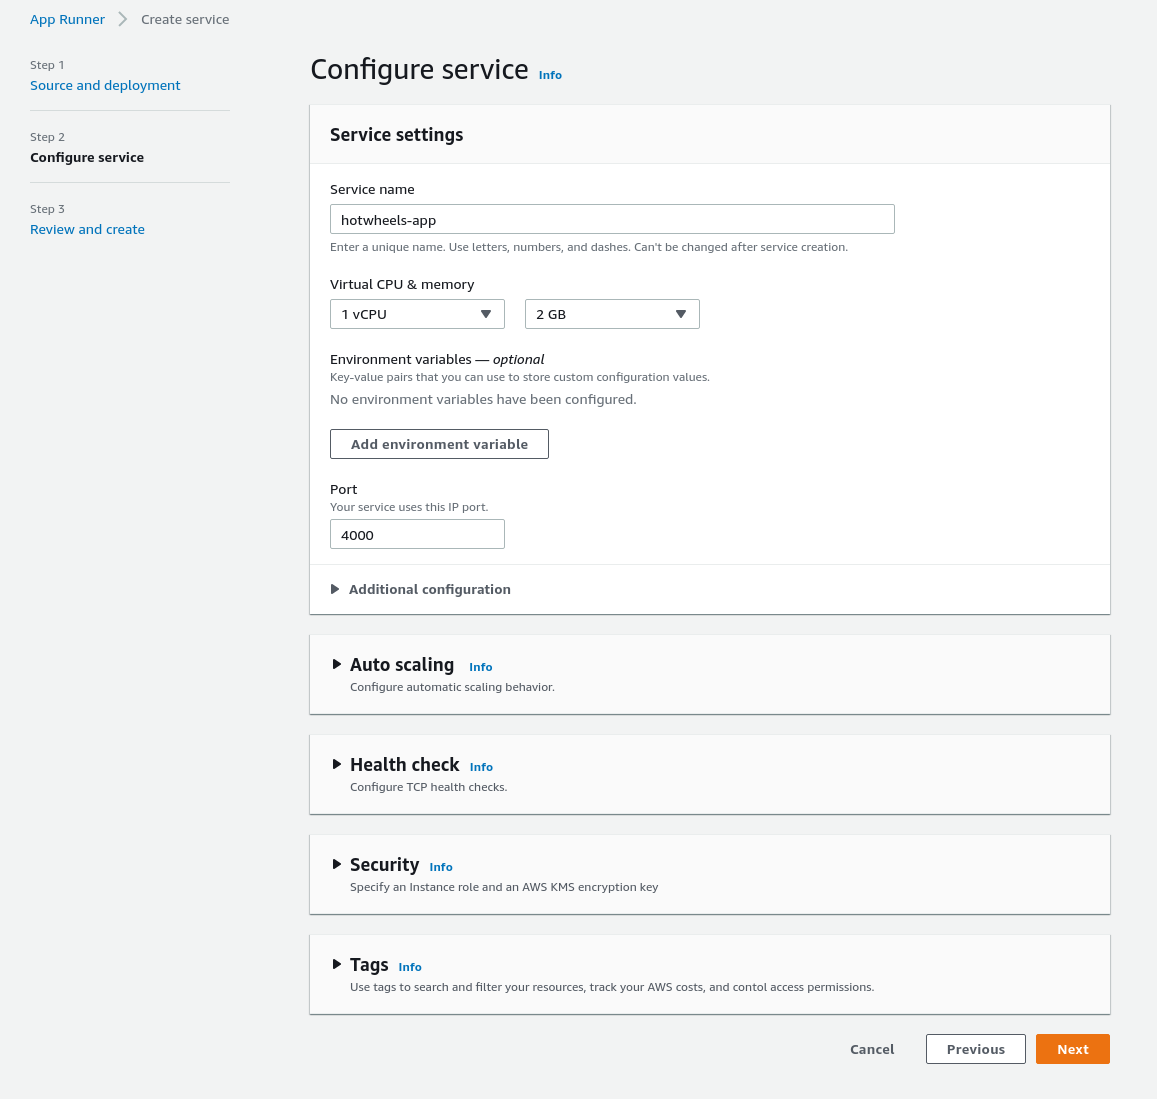
For step two all you need to do is give the application a name and fill out the port number. In this step you’re also able to customize the auto-scaling settings, you can set minimum and maximum instances as well as the amount of concurrent requests your application should reach before adding more instances.
Step three is just reviewing your configurations but you can also edit anything here if you wanted to. After you’re done reviewing just click “create & deploy” and wait for your application to be created.
Issues
As of May 20th, 2021, creating a service role is a bit bugged and you’ll get an error the first time you use App Runner when you get to the 3rd step. What I did was select “create service role” then fill out the information until the end then click create & deploy. You may or may not get an error depending on if it’s fixed or not but if it isn’t all you have to do is go back to step one and select “use existing role” and select the app runner role from the list then try deploying again.
If everything goes well you should see a message saying the deployment was successful and there is a link provided under “default domain” to view your newly deployed application! Remember to tear down the environment after playing around with it also!
Conclusion
I think App Runner is pretty neat and I may use it in the future to host an application. Another free alternative would be Heroku but if you’re looking for something equivalent in the AWS space this is it. I’d suggest to keep poking around and taking a look at the pricing breakdown and find which configuration fits for you.